For those of you just joining us, a few weeks ago, a co-worker and friend of mine finagled his way into getting me to make him a pair of customized, extra-warm smoker's gloves. And by "finagle," I mean he offered to buy the yarn and a pair of needles and I was sold. We've all got our weaknesses, ya know?
And the truth is, whether you're a smoker or not, these gloves are mighty handy. It gets gosh durn cold here in Boston. And who suffers most? That's right: our fingers. Even if you or the recipient of your knitted goodies aren't smokers, these mittens are still perfect for grabbing billfolds out of bags, snagging hot pretzels from street vendors, and all your other wintry shenanigans. I'm thinking of knitting myself a pair--once I'm done with all the other projects I've got up in the air, of course. (Of COURSE! Who needs another project? Not me! Hee hee...hee. Oh dear.)
When all was done and knit, my pattern was really nothing like the original Cigar pattern off of which I had been basing my gloves. So I will give a nod to Mr. Cigar and claim this cousin as my own, thanks very much. For all interested parties, here is the Aid-and-Abet Smoker's Gloves pattern and other sundry details. (Apologies in advance if there are formatting errors in this pattern--MS Word and I have been having...issues with each other. If you're interested in knitting this pattern, e-mail me at mythreeloves (at) gmail (dot) com and I'll send it to you in an attachment.)
Oh, and P.S. if you're not really interested in the pattern details, but wanna see some groovy pictures of the gloves, scroll on down to the bottom!
Size
S [M, L]
Finished Measurements:
Width: 3.5 [3.75, 4] inches
Length: 9 [9.5, 10]
Materials:
* 100% light worsted wool; 330 yd/297 m/150g (Shown in Plymouth Indiecita Alpaca (3 skeins)
* 1 US #4 circular needle (or 4 double pointed #4)
* Waste yarn
*Tapestry needle
Gauge:
25 sts/32 rows = 4 inches in stockinette
Pattern Notes:
The only tricky thing with these gloves is keeping the left one and the right one straight while you’re knitting. The right glove will have fingerless index and middle fingers (switch hands if knitting for a left-handed person), and each respective glove will have a row of purled stitches across the back of the hand—this is where you’ll pick up stitches to begin the mitten flaps on each hand. If you confuse the gloves, you’ll end up with a purled row across the palm instead of the back of the hand.
Directions for Gloves (make 2):
Using either the Magic Loop circular knitting method or 4 double pointed needles, CO 36 [40, 44] and divide stitches evenly between needles. Join and begin working in the round.
First Round: [K2, p2] to end.
Repeat round until work measures 2.5 [3, 3.5] inches (about 20 rows [24 rows, 28 rows])
Thumb Gusset
Next round: K all sts.
Increase round: K1, m1, k to end of round, m1.
Repeat these 2 rounds 5 times more. (48 [52, 56] sts)
Next 4 rounds: K 3 rounds. Work one increase round.
Repeat these 4 rounds 1 [2, 3] times more. (52 [58, 64] sts)
Next round: K to last 6 [7, 8] sts, place next 13 [15, 17] sts on waste yarn. (You will pick up these stitches later to make the thumb.)
Next Round: CO 1 st, rejoin round and k all sts. (40 [44, 48] sts)
K 4 more rounds.
Next round:
Right Hand: K 20 [22, 24] sts, p 20 [22, 24] sts (You will pick up these purled stitches later to begin the mitten flap.)
Left Hand: P 20 [22, 24] sts, k 20 [22, 24] sts
Next round: K 3 [4, 5] more rounds.
Next round: K16 [17, 18] sts, place next 8 [10, 11] sts on waste yarn (you’ll pick these up later for the pinky finger), CO 2 sts, rejoin round and k remaining 16 [17, 19] sts. Next round: K 5 [6, 7] more rounds.
Index Finger
K6 place next 22 [24, 26] sts on waste yarn, CO 3, rejoin round and k to end of round. (15 [15, 16] sts)
Right Hand: K 8 [9, 10] rounds (or until stitching reaches the bottom of the first knuckle). BO very loosely.
Left Hand: K 25 [28, 30] rounds (or until stitching just reaches the tip of the finger or slightly beyond).
Next round: [K1, K2tog] until end of round
Next round: K2tog until end of round. Break yarn leaving a generous tail, draw the tail through the remaining sts, and pull tight.
Middle Finger
Working sts clockwise (so knit stitches face outwards), pick up and k 3 sts in CO sts from Index Finger, pick up and k 5 [5, 6] sts from waste yarn on one side of hand (next to Index Finger), CO 3, pick up and k 5 [6, 6] sts from waste yarn on other side of hand (next to Index Finger). Join to work in the round. (16 [17, 18] sts)
Right Hand: K 9 [10, 11] rounds (or until stitching reaches the bottom of the first knuckle). BO very loosely.
Left Hand: K 30 [33, 35] rounds (or until stitching just reaches the tip of the finger or slightly beyond).
Next round: [K1, K2tog] until end of round
Next round: K2tog until end of round. Break yarn leaving a generous tail, draw the tail through the remaining sts, and pull tight.
Ring Finger
Pick up and k 3 sts in CO sts from Middle Finger, pick up and k remaining 10 [11, 12] sts on waste yarn next to Middle Finger, and join to work in the round. (13 [14, 15] sts)
K 25 [28, 30] rounds (or until stitching just reaches the tip of the finger or slightly beyond).
Next round: [K1, K2tog] until end of round
Next round: K2tog until end of round. Break yarn leaving a generous tail, draw the tail through the remaining sts, and pull tight.
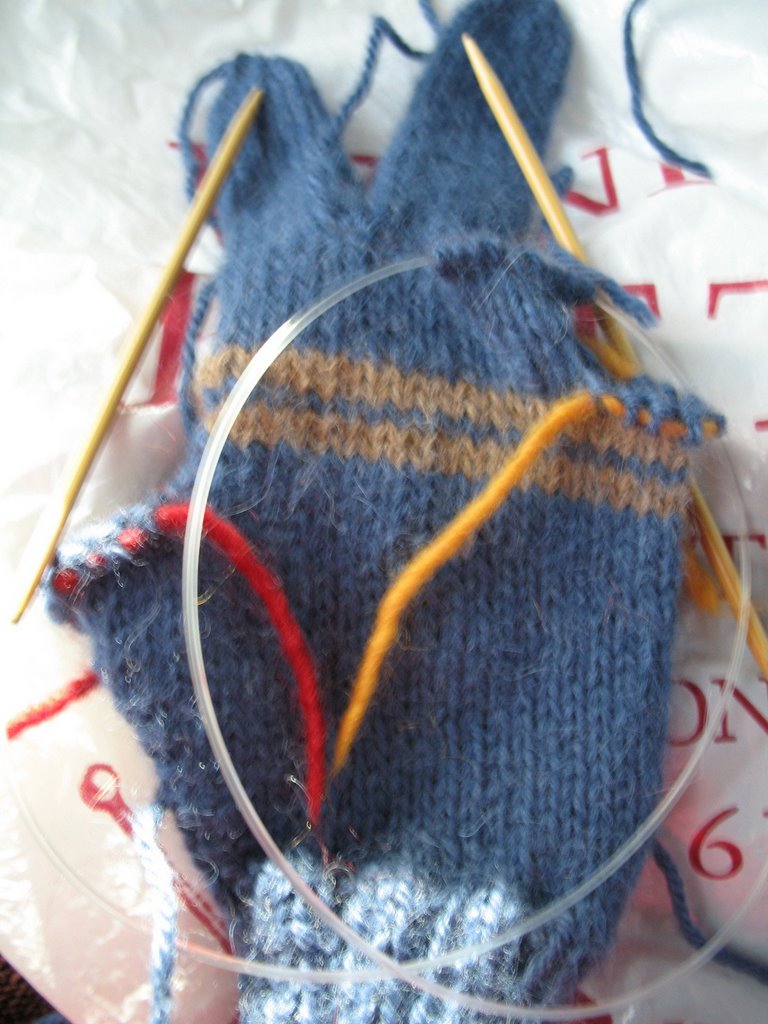
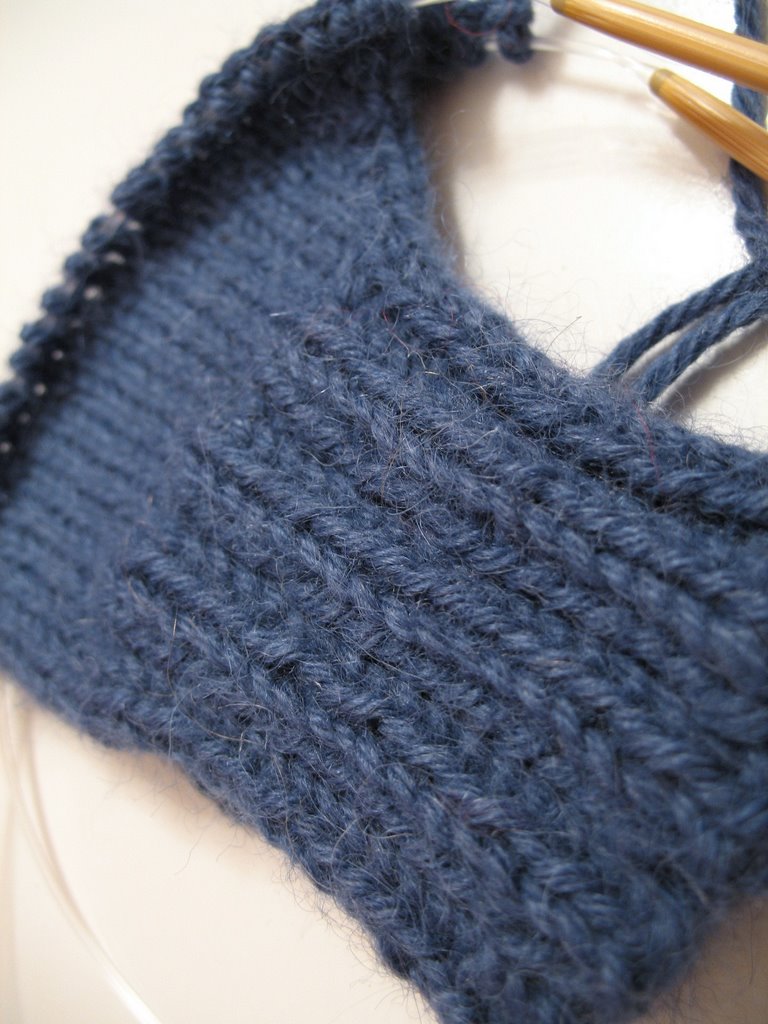
Creepy-looking half-finished glove. I've just picked up the stitches being held for the ring finger. The red and yellow strings are pieces of waste yarn holding the stitches.

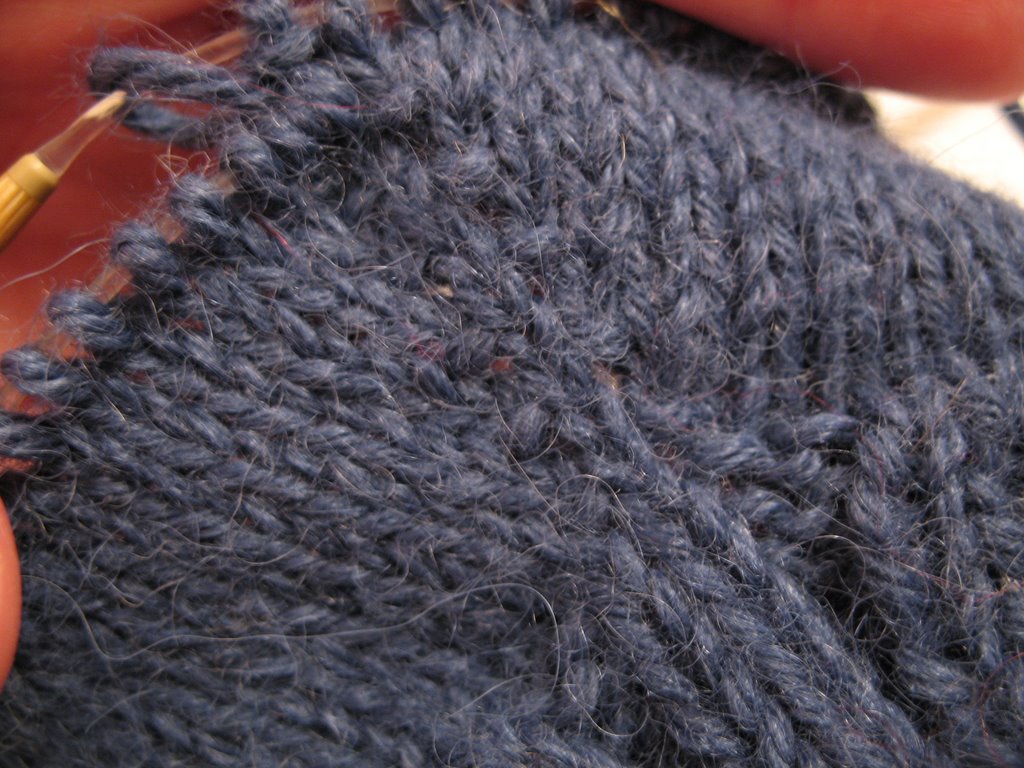
Close up of picked-up stitches on the ring finger. The top three stitches were picked up from the cast-on stitches in the middle finger and the bottom stitches were being held on waste yarn. I'm about to knit the first round.
Pinky Finger
Pick up and k 4 sts in the CO next to the held sts for the Pinky Finger, pick up and k 8 [10, 11] sts being held on the waste yarn. (12 [16, 17] sts)
K 18 [20, 22] rounds (or until stitching just reaches the tip of the finger or slightly beyond).
Next round: [K1, K2tog] until end of round
Next round: K2tog until end of round. Break yarn leaving a generous tail, draw the tail through the remaining sts, and pull tight.
Thumb
Pick up and k 3 sts in the CO next to Thumb Gusset, k 13 [15, 17] sts being held on waste yarn. (16 [18, 20] sts)
K 18 [20, 22] rounds (or until stitching just reaches the tip of the finger or slightly beyond).
Next round: [K1, K2tog] until end of round
Next round: K2tog until end of round. Break yarn leaving a generous tail, draw the tail through the remaining sts, and pull tight.
Mitten Flap
Note: Work clockwise so that the knit stitches face outwards. On the right hand, begin picking up purled stitches and begin each following round on the pinky finger side. On the left hand, begin picking up purled stitches and begin each following round on the thumb side.
First row: Pick up and k 20 [22, 24] sts from the purled row across the back of the hand.
CO 21 [23, 25] stitches (these CO sts will be the front of the mitt), and join with the picked-up sts to work in the round. (41 [45, 49] sts)
Next round: K 20 [22, 24] (across back of hand), [k1, p1] next 21 [22, 24] sts to end of round.
Next round: Repeat this round once.
Next round: K all sts a total of 34 [38, 42] more rounds (or until the tip of the mitten is about 4 rows below the tip of the middle finger.)

Half-finished mitten flap on left hand
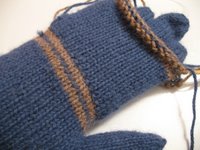 Half-finished mitten flap showing the join on the back of the hand.
Decrease row: K4, k2tog, and repeat to end of row.
Repeat this decrease round 3 more times.
Decrease row: K3, k2tog, and repeat to end of row
Repeat this decrease round 1 more time.
Finishing: Divide remaining sts between two needles and graft sts together using the kitchener stitch.
(Alternatively, [k2, k2tog] for one more round and then pull taiont>l through the remaining stitches to close.)
Weave in all loose ends.
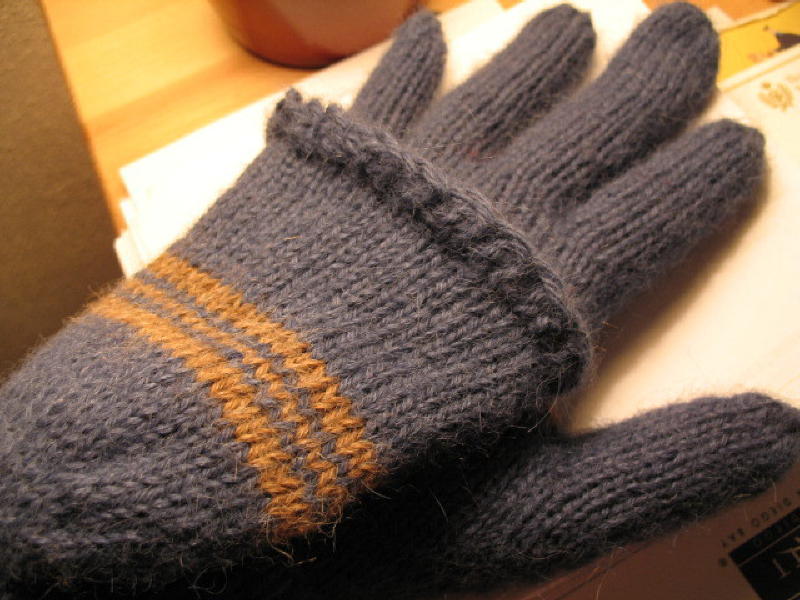
 Finished left-hand glove
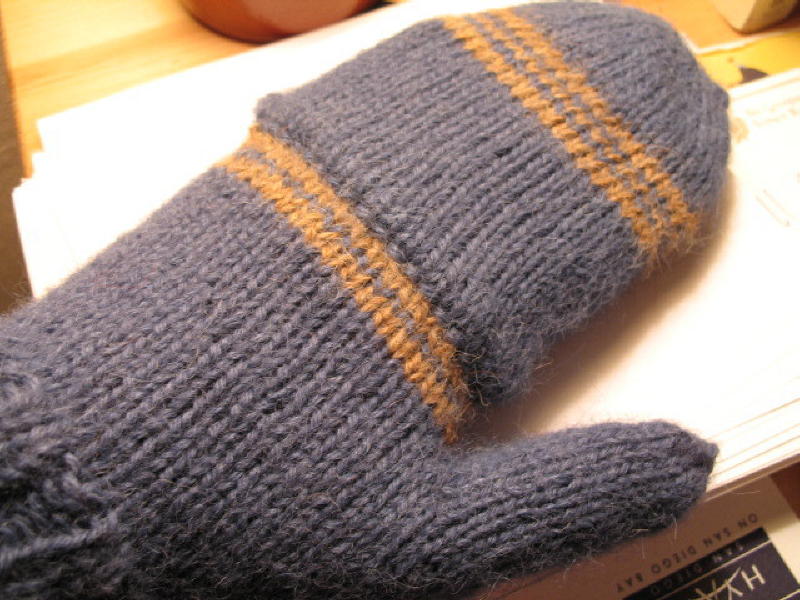
 Finished left-hand glove with mitten flap, back side.
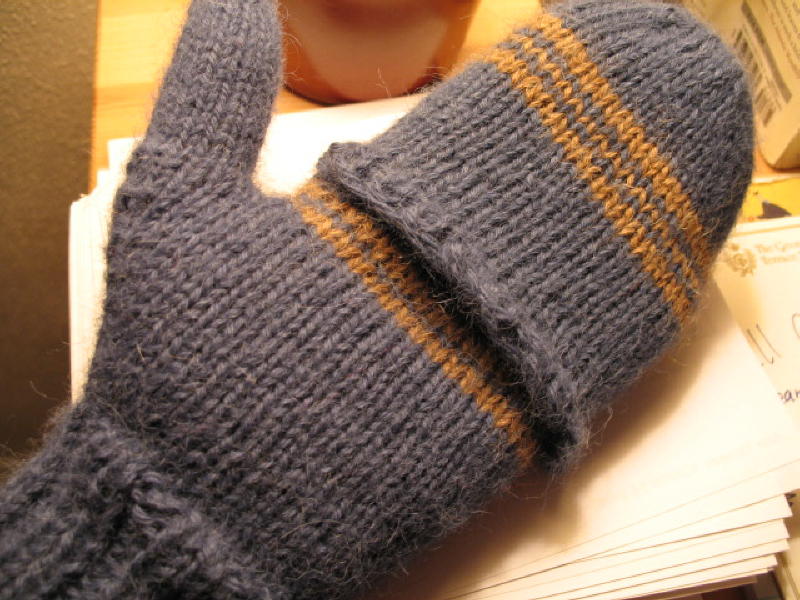
 Finished left-hand glove with mitten flap, palm-side.
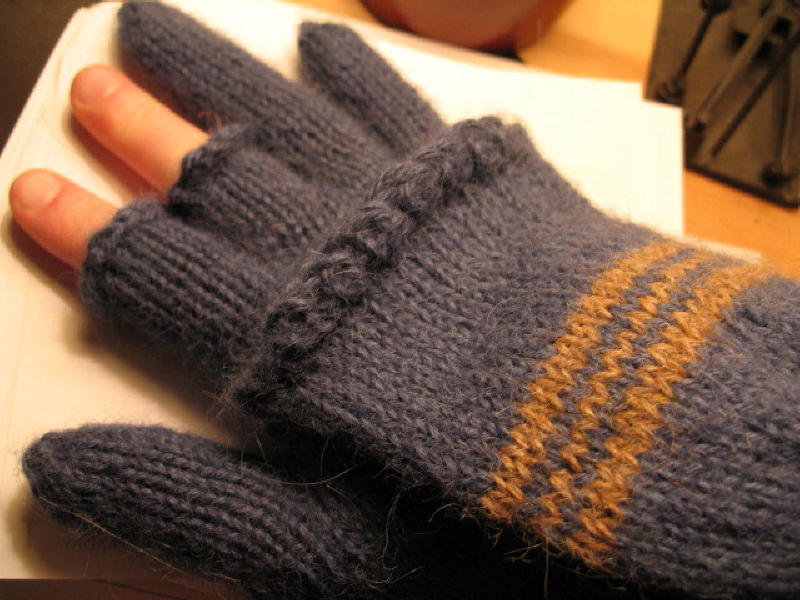
 Finished right-hand glove